Hi Members,
I'm new to the site, but enjoyed the hobby since I was about 18 and now with kids at 54, a renewed interest.
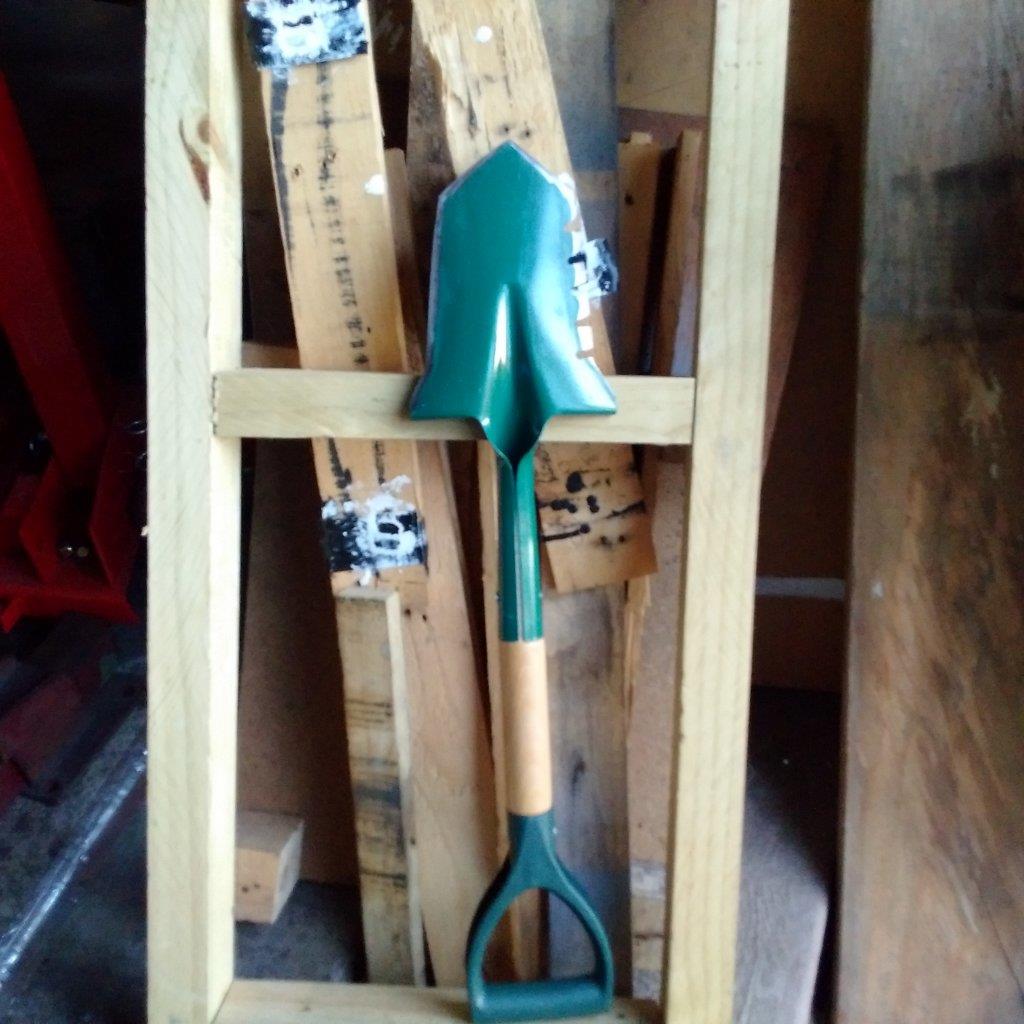
We have all seen these for sale, some are expensive, some reasonably priced for the quality.
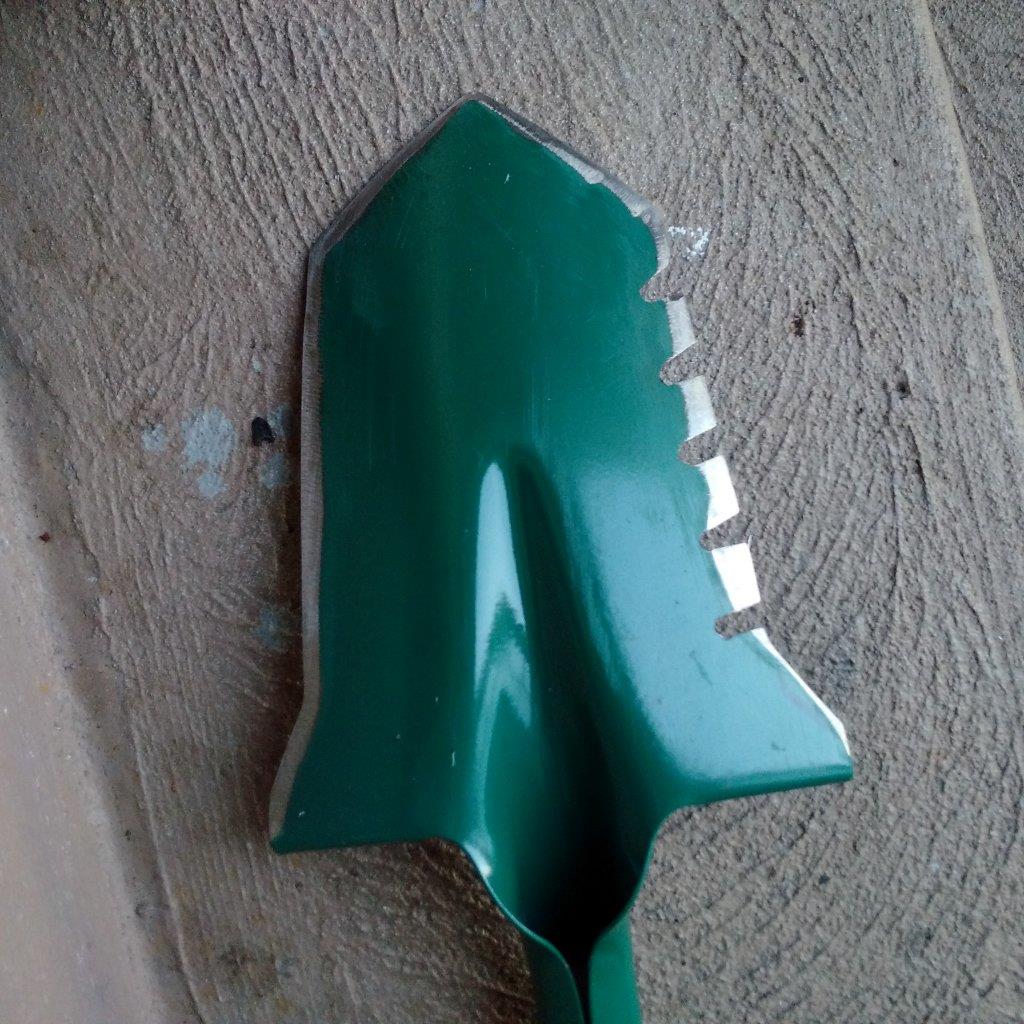
Here I am providing you an easy alternative to make your very own from a new spade or an old spade in the shed
if you have a spare one.
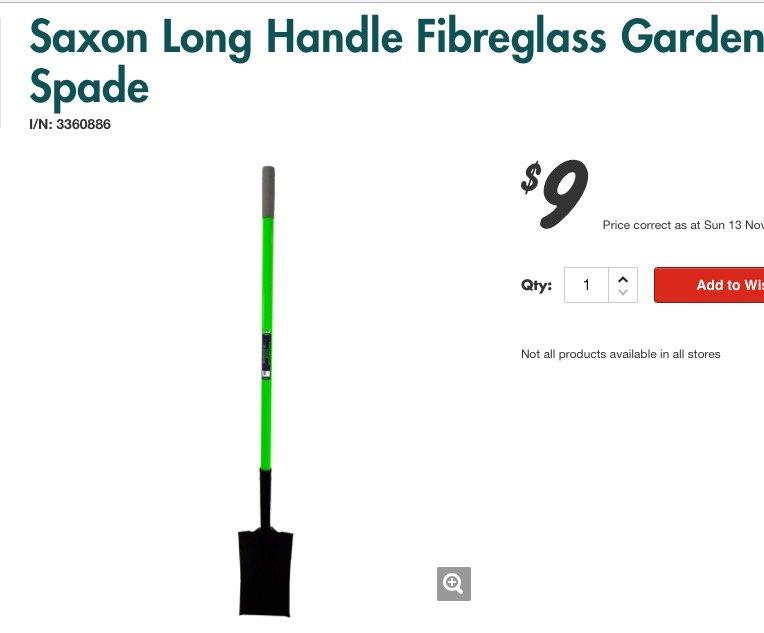
I installed the long handles, to originally short handle spades.
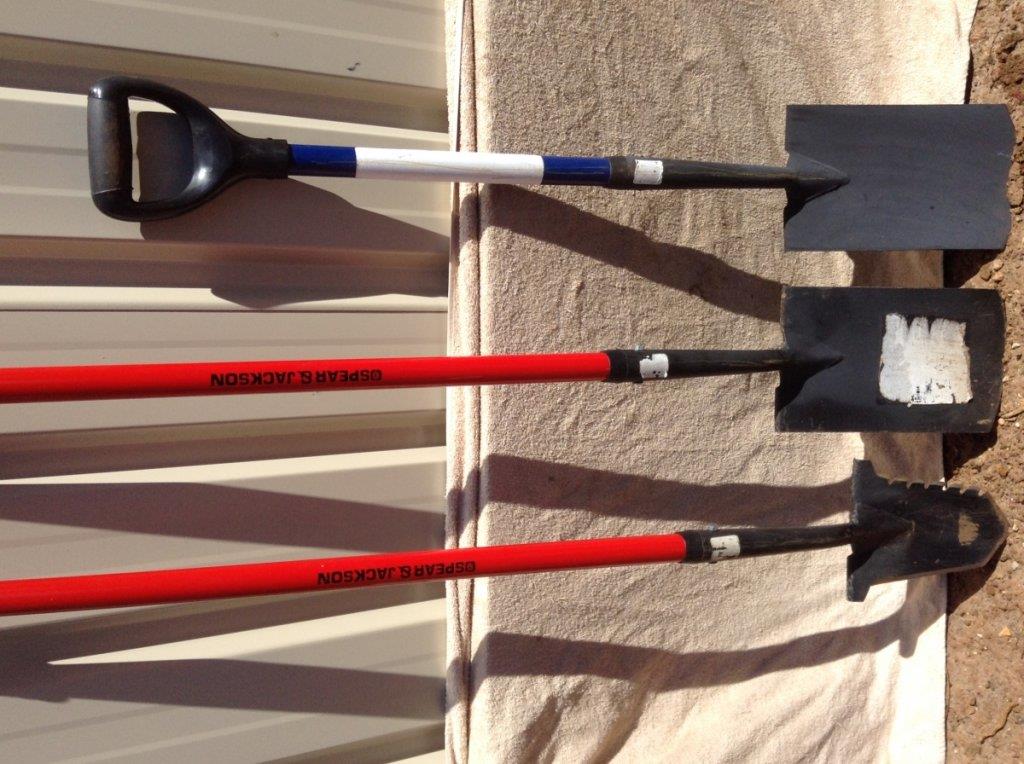
I have designed and made these, so simple to do, and a great tool in the kit for the field if you are a coin hunter
or treasure hunter.
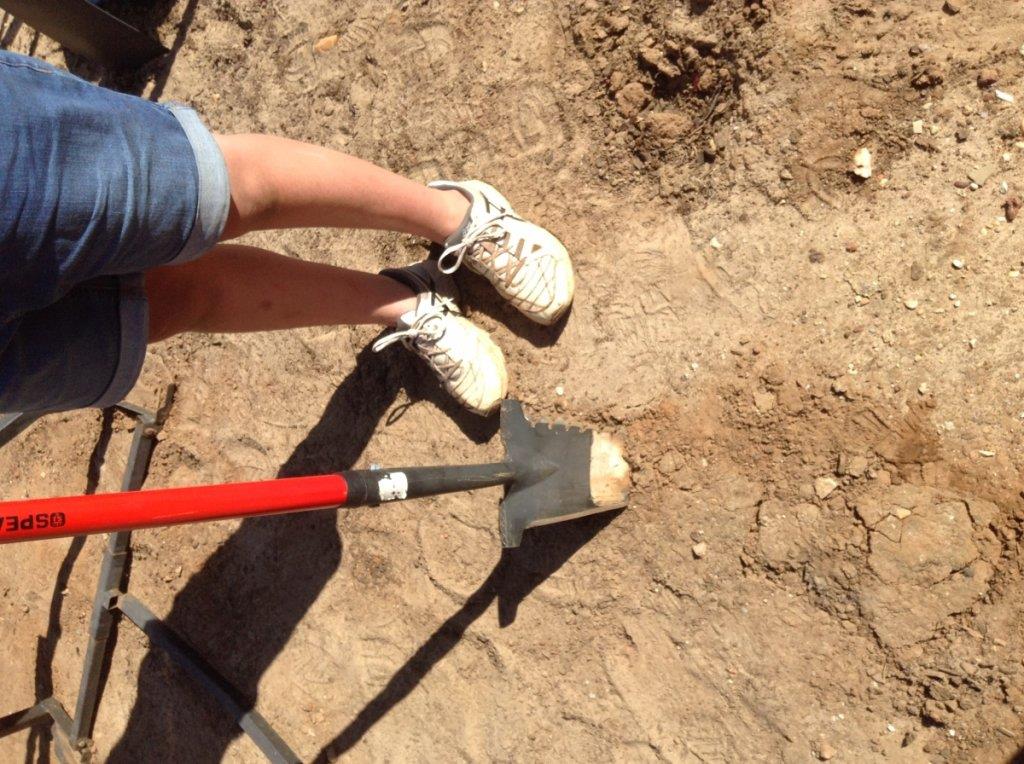
For this instructional I made another 'plug digga' yesterday for pics and Kato my off-sider.
It took more time to make the template and take the photos, than to do the cutting and grinding.
Give it a go and show me your NEW "plug digga" when you are done, cheers and enjoy.
IMPORTANT - READ THROUGH CAREFULLY BEFORE STARTING, AND UNDERSTAND THE TASK.
USE SAFETY GEAR FOR EYES, EARS, BODY AND FACE.
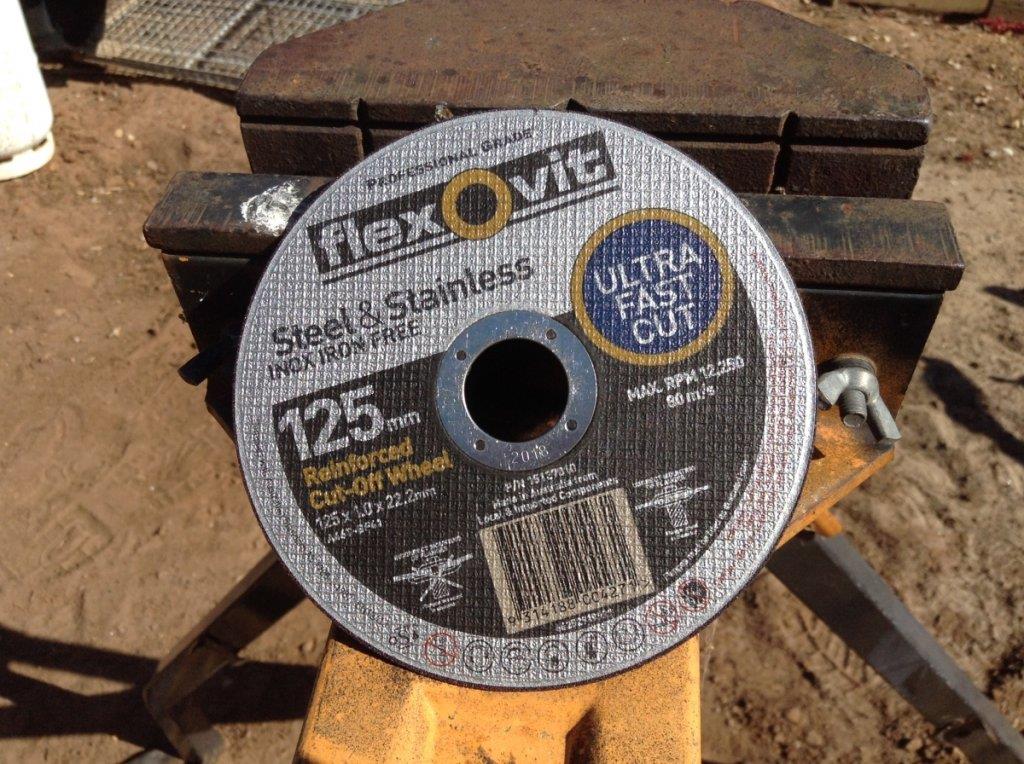
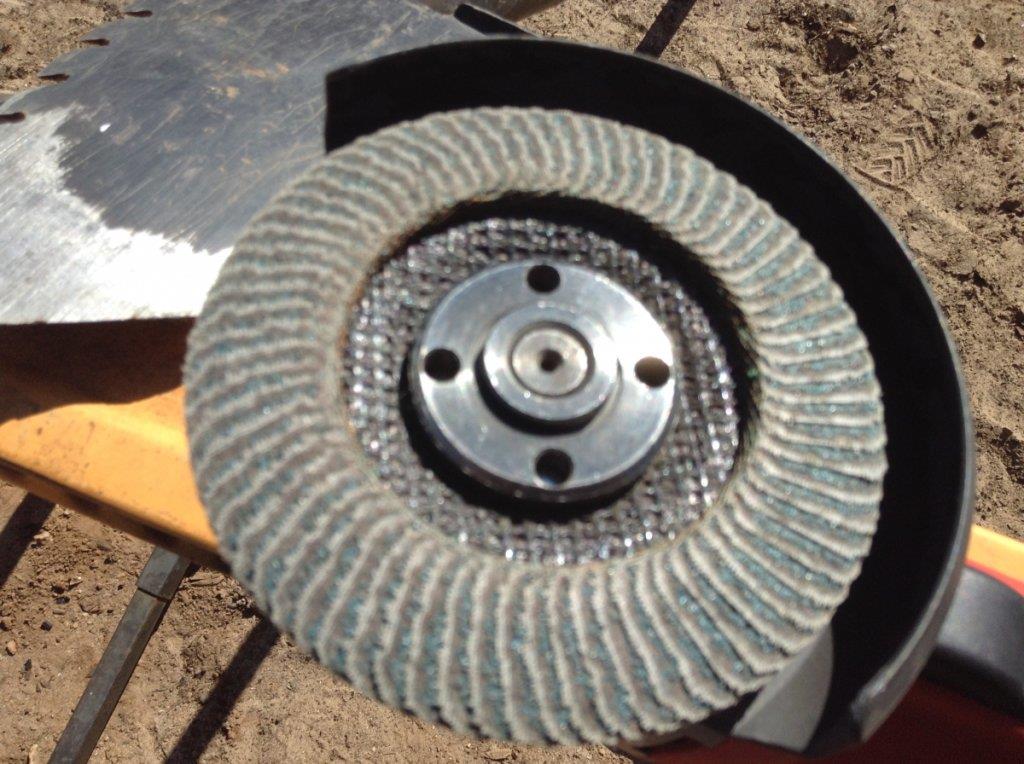
Tools you will need - angle grinder, 1mm cutting disk, grinding flap wheel or grinding disk,
drill - 1/8 drill bit (pilot hole) and 5mm or up to 8mm drill bit.
Maybe a vice to hold spade while cutting and grinding.
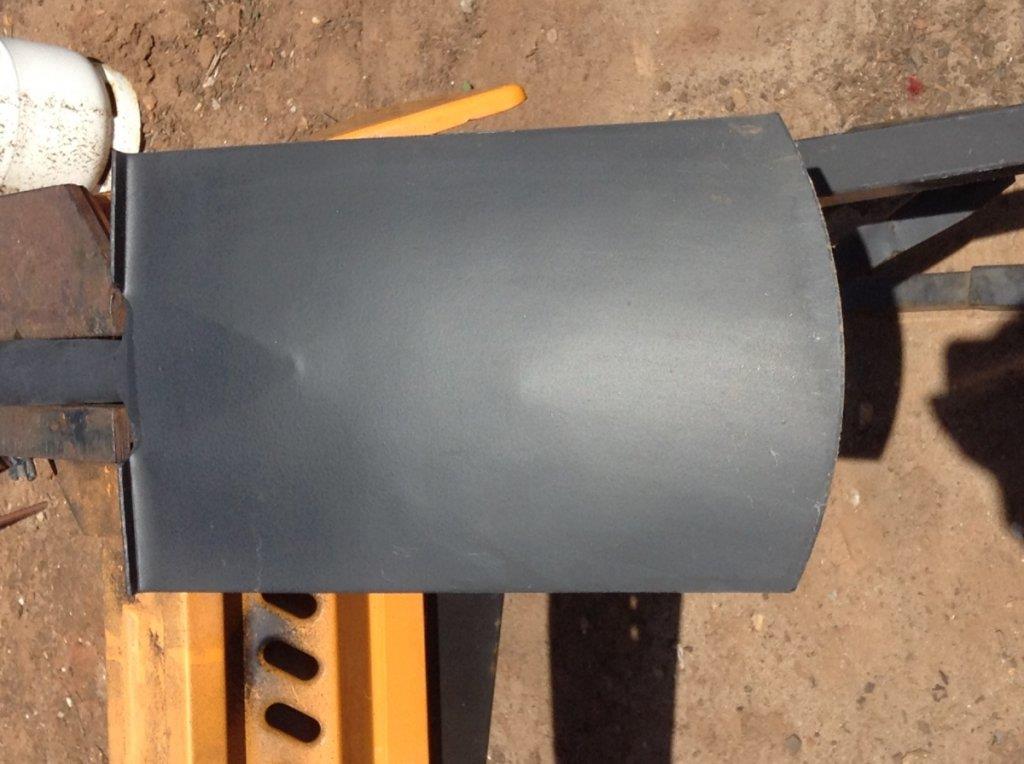
Materials needed - spade and template.
Download and print out the template, trim out the template with scissors to get the general shape of the 'plug digga',
cut off just the outer edges, dont cut out the detailed bits for the root cutting edge, that's the guide for drilling holes and
cutting the saw teeth bits out.
https://www.prospectingaustralia.com/forum/doc/member-docs/8767/1478512837_spade_template_2.pdf
Now you have the 'STICK TO the spade blade template', use any sort of glue handy, spray glue, clag, uhu,
any paper glue will do, even hair spray might do it !
Most important is that the template is centered and stuck to the BACK of the spade blade.
You will only use the top 3/4 of the spade, so if you want a longer 'plug digga', just modify as required by sliding the template down
and cutting longer side edges.
Image of template drawn on the BACK of the spade blade and what we are aiming for - a 'plug digga'.
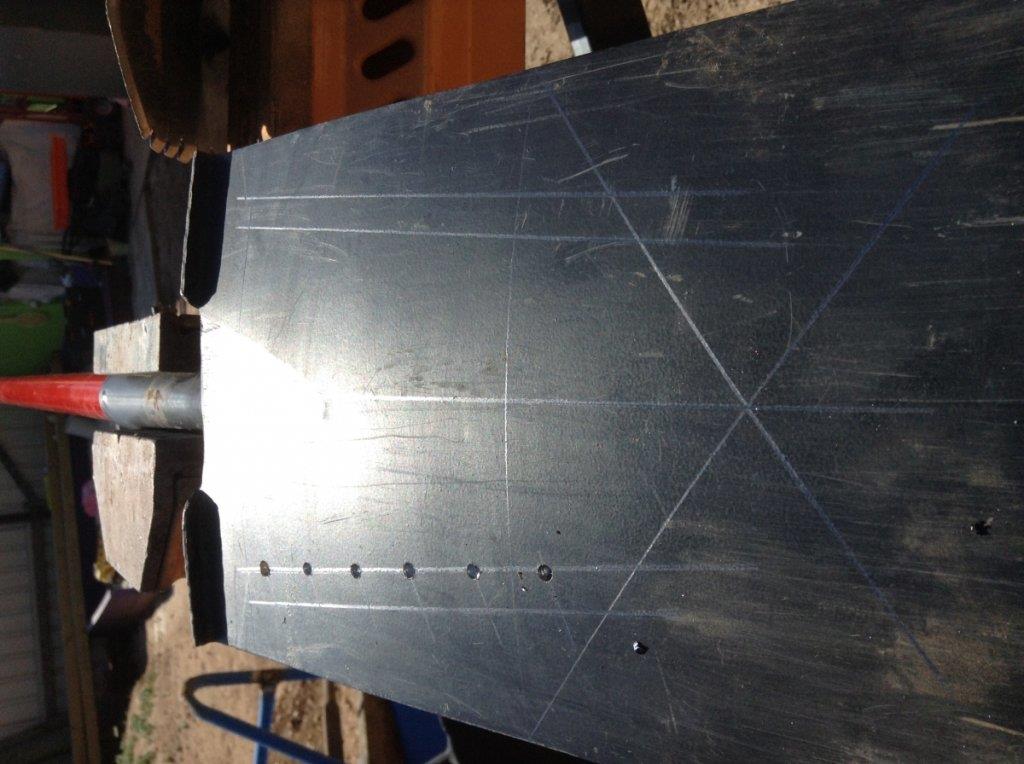
NOW the easy stuff, we use the Drill for the holes and the Grinder with a thin cutting blade to trim off the OUTER EDGES of the 'digga' template.
Drill pilot holes with the 1/8 drill bit in each of the circles and then Drill the holes larger with the bigger drill bit, 5mm or up to 8mm.
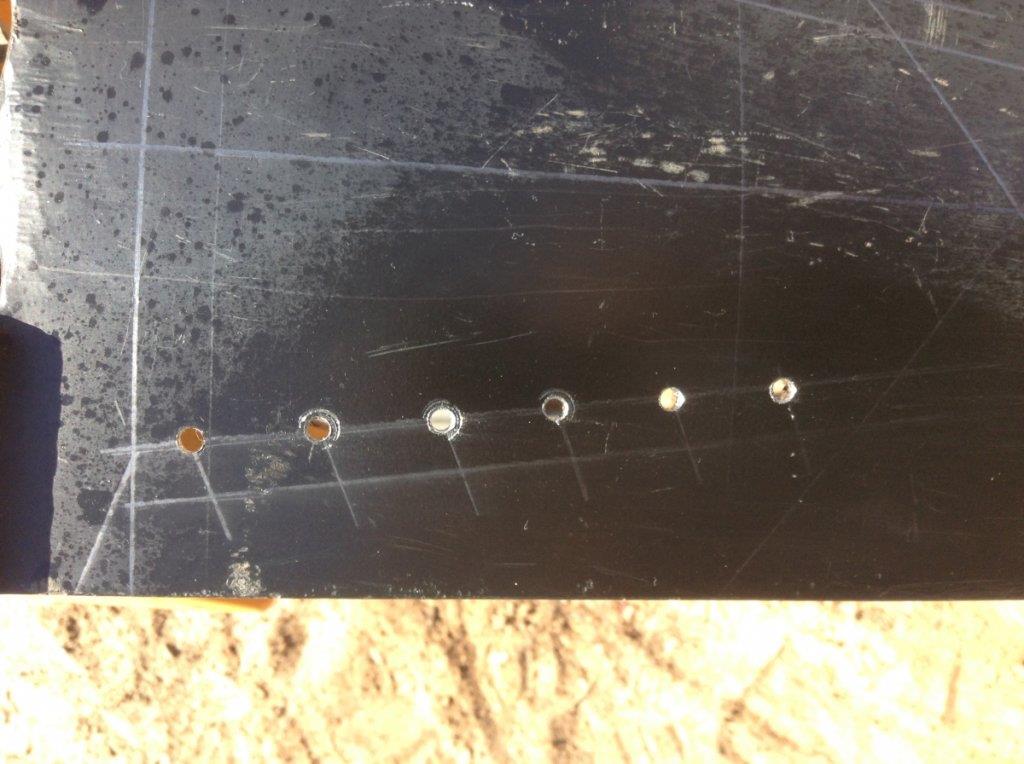
IMPORTANT - Cutting - start at the bottom Vee, all cuts are on the far outside lines where the paper meets the steel, basically cut off the exposed steel only !
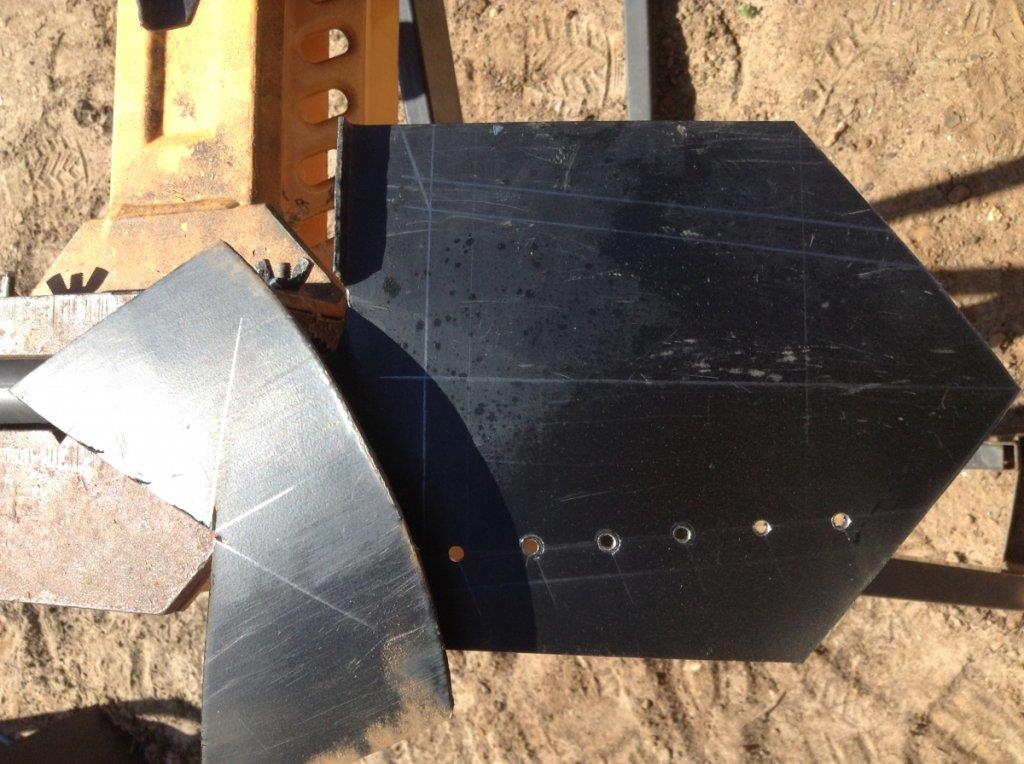
Small trim cut under the boot step, follow the template, then the exposed steel on the side edges - long cuts.
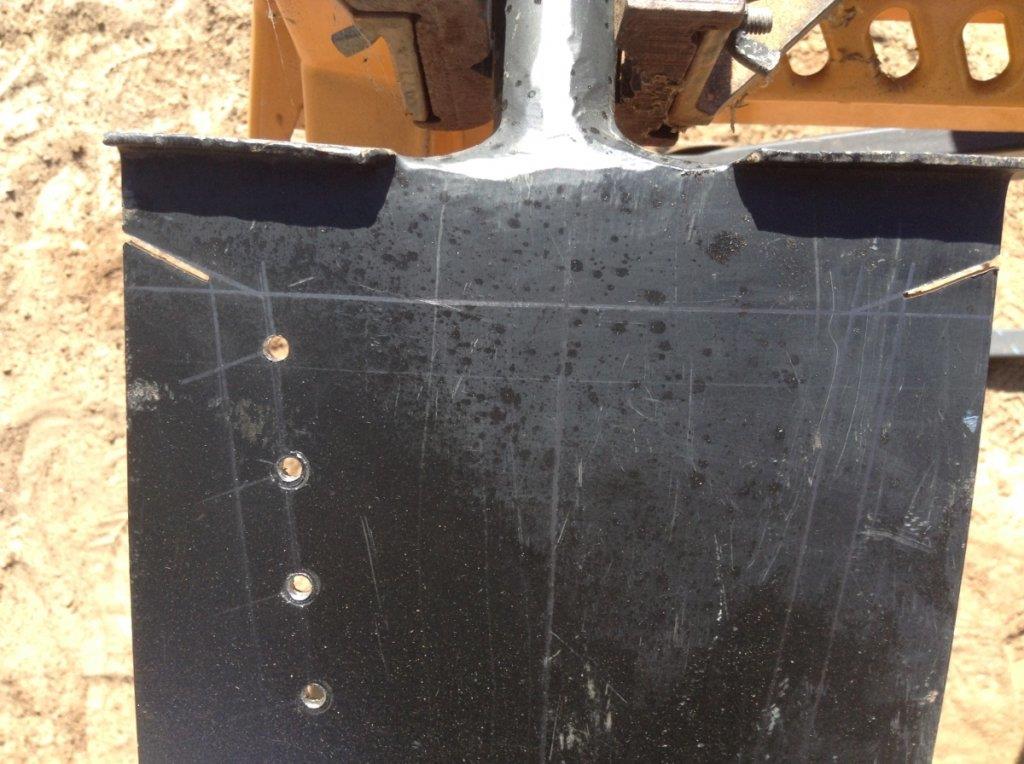
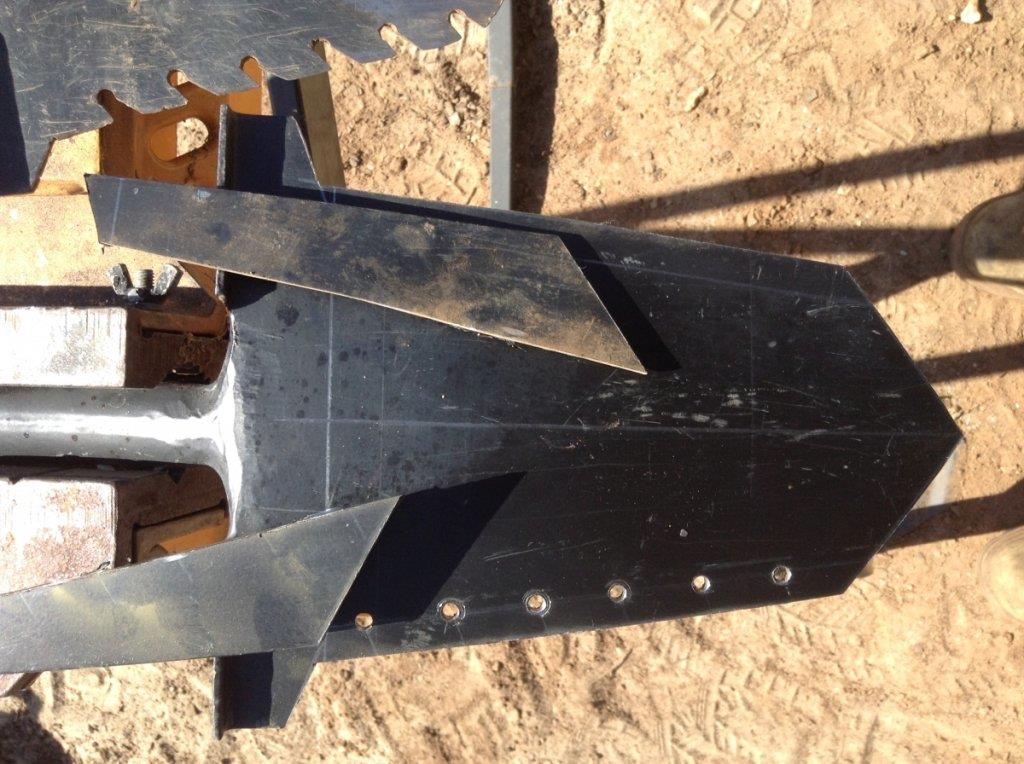
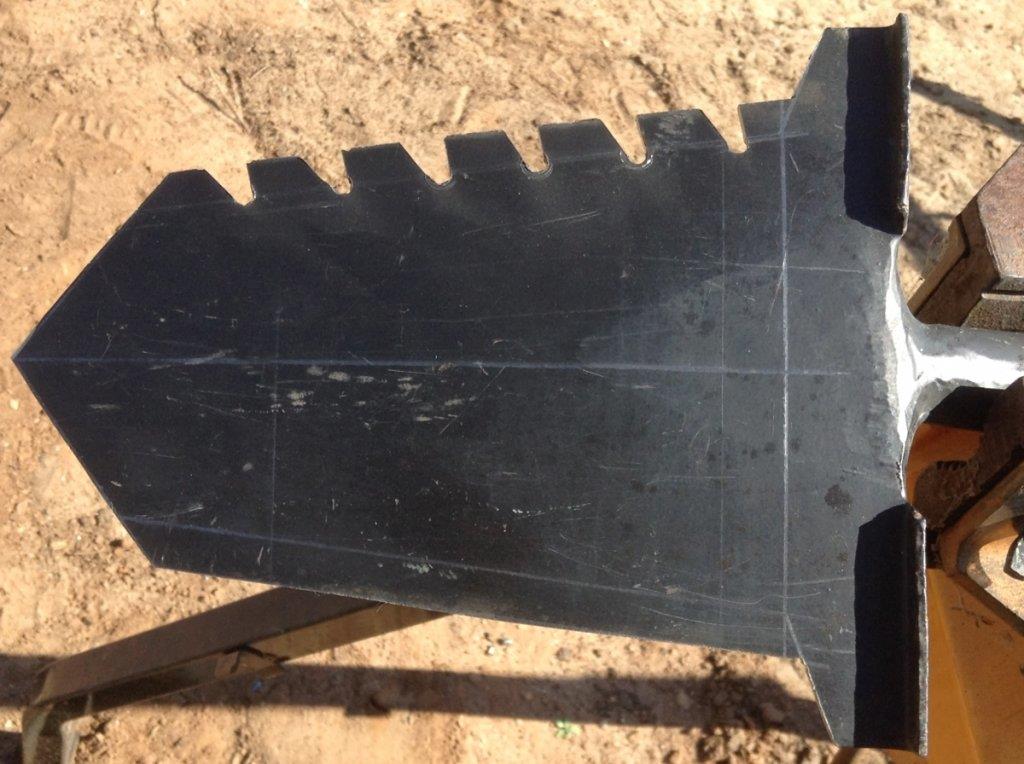
SO BY NOW, you should have the BASIC shape and need to cut the teeth of the root cutting edge.
Just trim out the bits of the template into the holes you drilled out earlier - you have teeth !
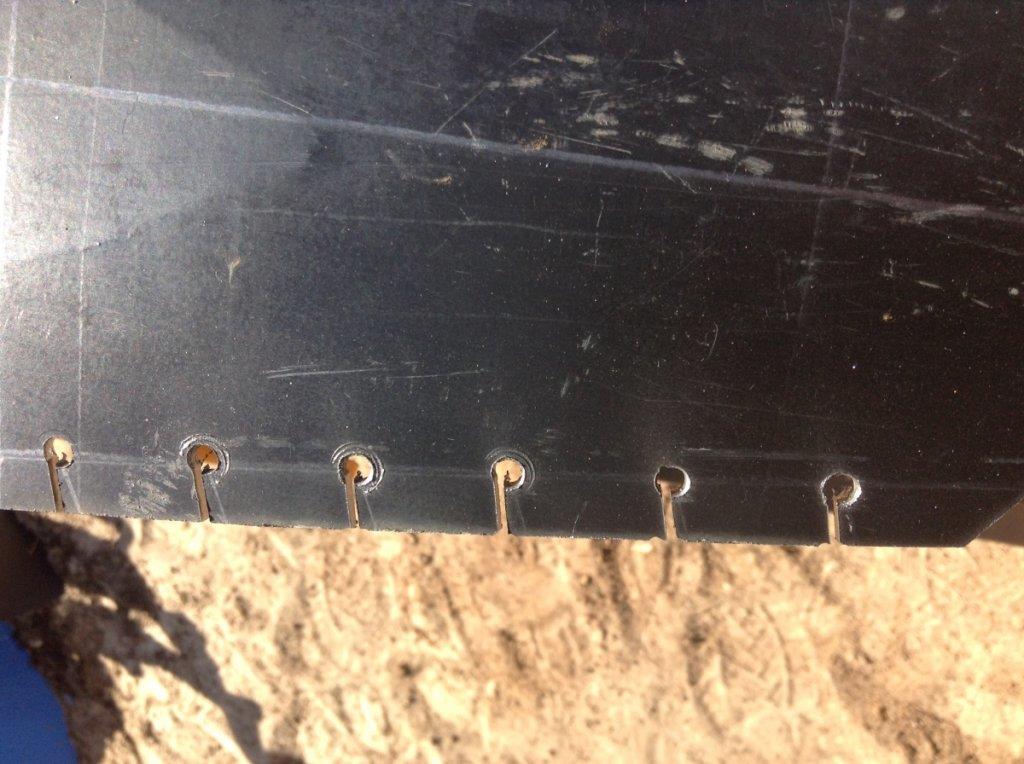
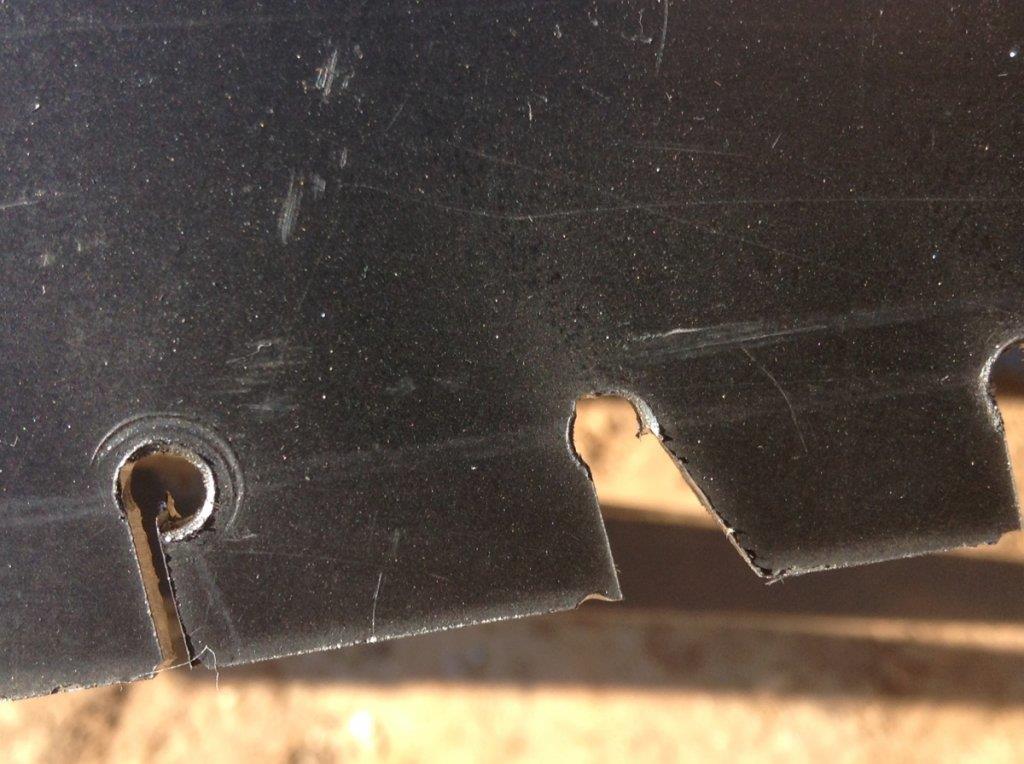
WE ARE NEARLY FINISHED NOW, you need to flip the spade over and grind an angled tapered edge on the FRONT of the spade,
this will be about 10mm wide around all the sides and bottom vee edge to point.
Use a flap disk or grinding disk for this, dont get the steel too hot by grinding too hard in one place.
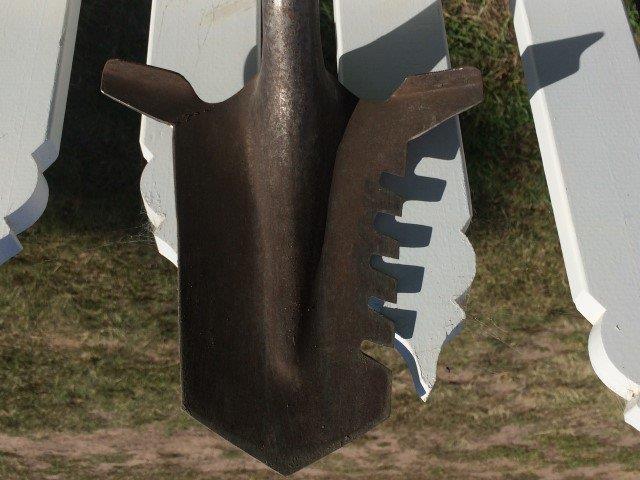
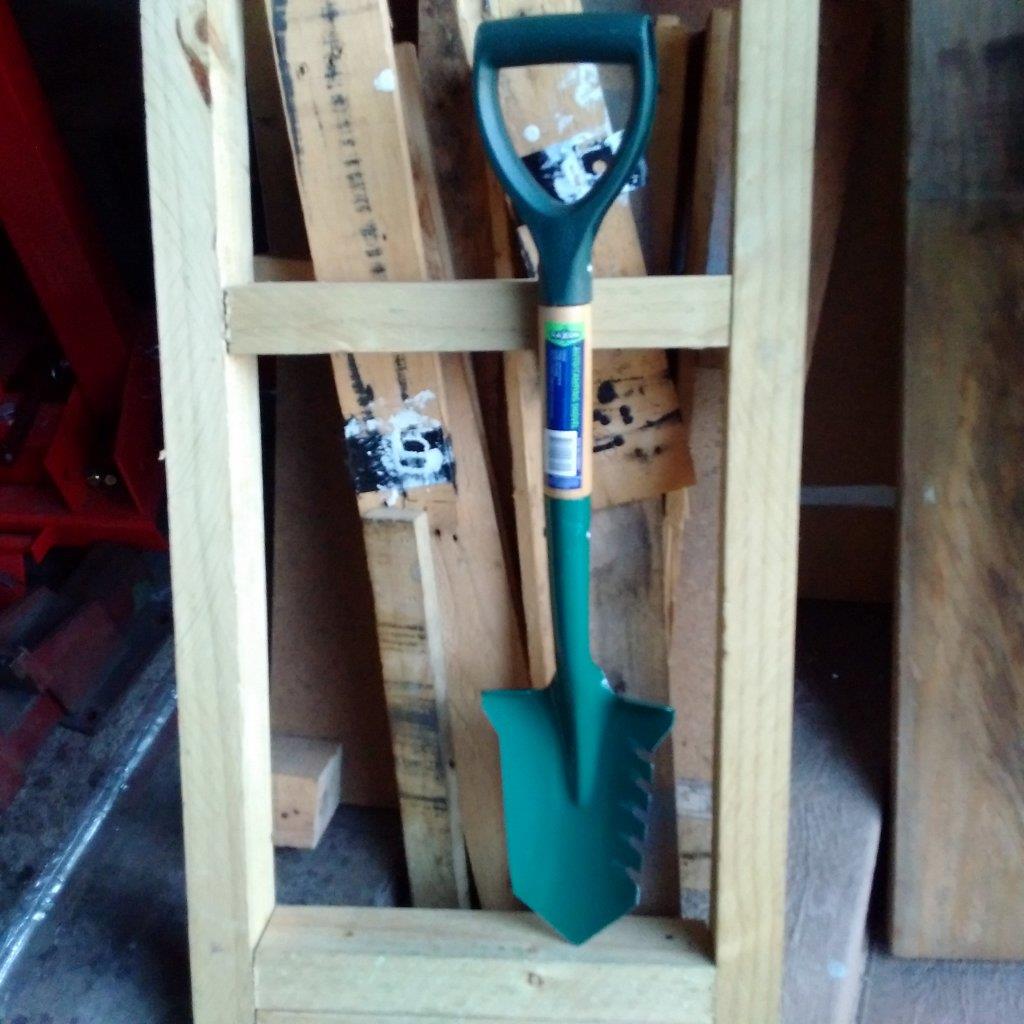
It should look like this before the tapered edge, and then the after the edge is done - ready to go dig some plugs !
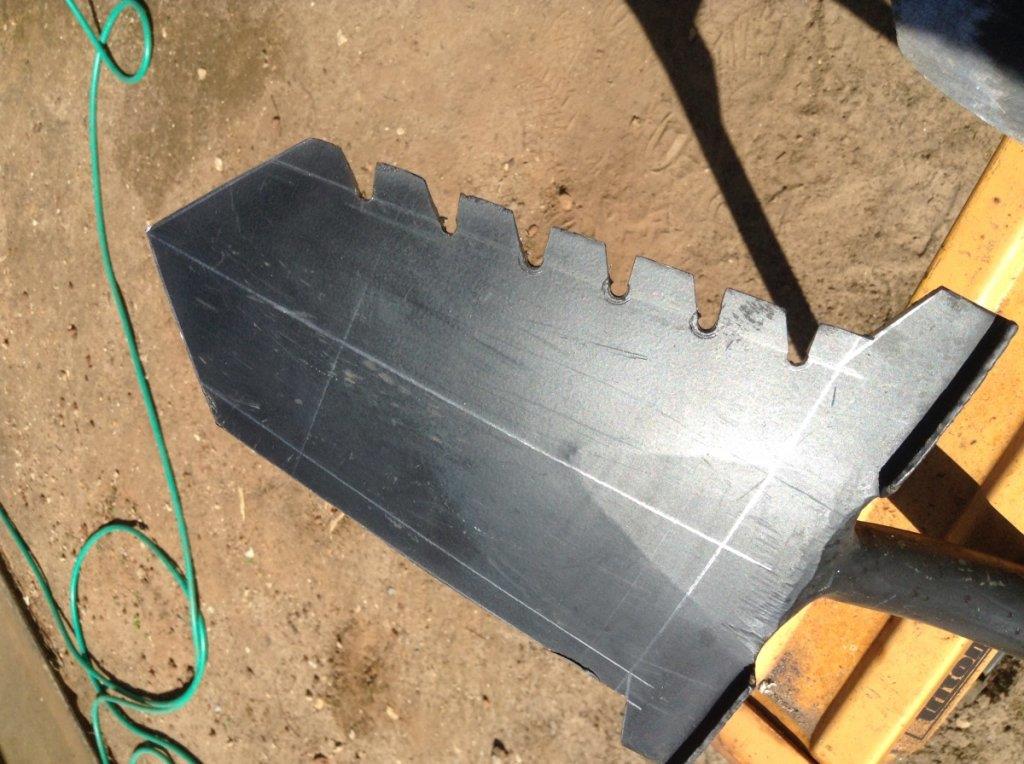
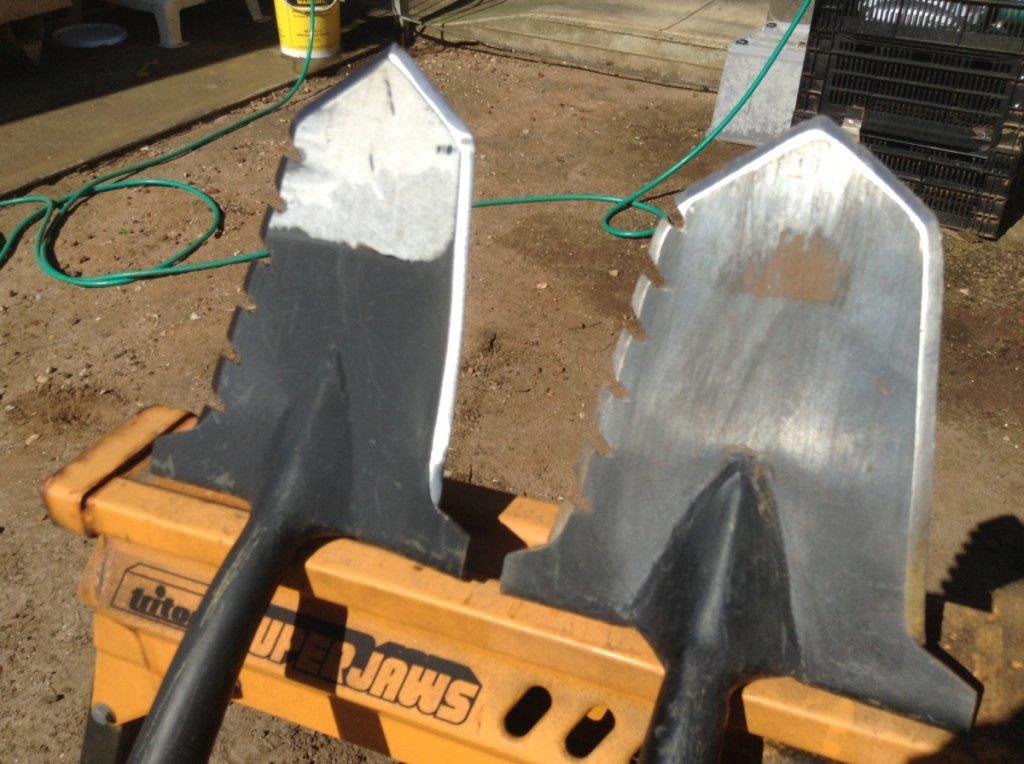
Your job is done !
Another tool for your hobby, made by your own hands !
Enjoy and be safe.
Compliments from Greenhornet and Kato.
Moderators if you wish to sticky it to the top of the DIY, or insert it into EPIC Projects as well as DIY, be my guest, I just want to contribute.
I'm new to the site, but enjoyed the hobby since I was about 18 and now with kids at 54, a renewed interest.
We have all seen these for sale, some are expensive, some reasonably priced for the quality.
Here I am providing you an easy alternative to make your very own from a new spade or an old spade in the shed
if you have a spare one.
I installed the long handles, to originally short handle spades.

I have designed and made these, so simple to do, and a great tool in the kit for the field if you are a coin hunter
or treasure hunter.
For this instructional I made another 'plug digga' yesterday for pics and Kato my off-sider.
It took more time to make the template and take the photos, than to do the cutting and grinding.
Give it a go and show me your NEW "plug digga" when you are done, cheers and enjoy.
IMPORTANT - READ THROUGH CAREFULLY BEFORE STARTING, AND UNDERSTAND THE TASK.
USE SAFETY GEAR FOR EYES, EARS, BODY AND FACE.
Tools you will need - angle grinder, 1mm cutting disk, grinding flap wheel or grinding disk,
drill - 1/8 drill bit (pilot hole) and 5mm or up to 8mm drill bit.
Maybe a vice to hold spade while cutting and grinding.


Materials needed - spade and template.

Download and print out the template, trim out the template with scissors to get the general shape of the 'plug digga',
cut off just the outer edges, dont cut out the detailed bits for the root cutting edge, that's the guide for drilling holes and
cutting the saw teeth bits out.
https://www.prospectingaustralia.com/forum/doc/member-docs/8767/1478512837_spade_template_2.pdf
Now you have the 'STICK TO the spade blade template', use any sort of glue handy, spray glue, clag, uhu,
any paper glue will do, even hair spray might do it !
Most important is that the template is centered and stuck to the BACK of the spade blade.
You will only use the top 3/4 of the spade, so if you want a longer 'plug digga', just modify as required by sliding the template down
and cutting longer side edges.
Image of template drawn on the BACK of the spade blade and what we are aiming for - a 'plug digga'.


NOW the easy stuff, we use the Drill for the holes and the Grinder with a thin cutting blade to trim off the OUTER EDGES of the 'digga' template.
Drill pilot holes with the 1/8 drill bit in each of the circles and then Drill the holes larger with the bigger drill bit, 5mm or up to 8mm.

IMPORTANT - Cutting - start at the bottom Vee, all cuts are on the far outside lines where the paper meets the steel, basically cut off the exposed steel only !

Small trim cut under the boot step, follow the template, then the exposed steel on the side edges - long cuts.


SO BY NOW, you should have the BASIC shape and need to cut the teeth of the root cutting edge.
Just trim out the bits of the template into the holes you drilled out earlier - you have teeth !


WE ARE NEARLY FINISHED NOW, you need to flip the spade over and grind an angled tapered edge on the FRONT of the spade,
this will be about 10mm wide around all the sides and bottom vee edge to point.
Use a flap disk or grinding disk for this, dont get the steel too hot by grinding too hard in one place.
It should look like this before the tapered edge, and then the after the edge is done - ready to go dig some plugs !


Your job is done !
Another tool for your hobby, made by your own hands !
Enjoy and be safe.
Compliments from Greenhornet and Kato.
Moderators if you wish to sticky it to the top of the DIY, or insert it into EPIC Projects as well as DIY, be my guest, I just want to contribute.


