DIY Battery pack

Prospecting Australia

Help Support Prospecting Australia:

This site may earn a commission from merchant affiliate links, including eBay, Amazon, and others.
Joined
Aug 7, 2021
Messages
6
Reaction score
0
Hi All,

I'll start by saying that I'll most likely purchase a battery pack from the same bloke who serviced my detector, but as is my nature, I wanted to have a crack at making a battery pack for my SD2100 first, I like the challenge.

The batteries that I am using now, the ole camcorder style are not lasting as long as I'd like and I think are on their way out, as was my other one I had, hence the new battery option. Currently a fully charged battery is around 6.8v - I'm aiming for around the 7.2-7.4 for the SD2100.

I also don't want to be spending millions on the SD, when I will look to upgrade in the new year, maybe.

I am seeking some info from people who have made a battery pack before and what type/style was used. I have seen so much information, my brain is overloaded. Is a 3S Lipo with a voltage reg/step down reg the go, or using Li-on batteries to make a battery pack the way to go?

The Lipo battery kind of make me nervous as I have read a few things online about how sensitive they are to charging, and the potential for a fire.

I've read most of the posts in here, but still unsure which way to go.

Worst case, I get another camcorder battery and swap the wiring over and go again.

Thanks in advance!

Peter
 
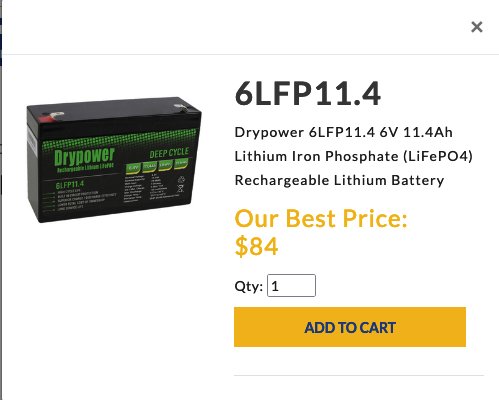
These are perfect for the 2100 and half the weight of the lead acid. You'll need the dome top that came with the GP'S it fits straight on, does away with that cumbersome termination block that came with the SD'S. The chargers are not expensive (around $40).
Extra voltage does absolutely nothing for the 2100.

1639962557_screen_shot_2021-12-20_at_9.01.28_am.jpg
 
i have been making mine for my Minelab detectors that i have. I currently have a gpx4500 with this battery pack i made works excellent fits in my pouch on my detector cover. and they last all day with no issues they may not look pretty but works well with no issues. All up cost me about $40 for 2 batterys and charger and parts to make connections.
 

Attachments

  • IMG20220411201038.jpg
    IMG20220411201038.jpg
    12.4 MB
  • IMG20220411201046.jpg
    IMG20220411201046.jpg
    11.4 MB
the 2100 was the first one i made it for about 12 months ago parts are easy to get at jaycar can give you a list of part numbers if needed.
 
i have been making mine for my Minelab detectors that i have. I currently have a gpx4500 with this battery pack i made works excellent fits in my pouch on my detector cover. and they last all day with no issues they may not look pretty but works well with no issues. All up cost me about $40 for 2 batterys and charger and parts to make connections.
The 4500 battery has a built in amplifier.
How do you get on without the built in amp?
 
The 4500 battery has a built in amplifier.
How do you get on without the built in amp?
If you use headphones it's not an issue as it doesn't cut in with headphones unless you change the wiring as per the GPX manual.
If you use speaker/s then you would need a booster/amp that most speaker users have anyway.
 
i have been making mine for my Minelab detectors that i have. I currently have a gpx4500 with this battery pack i made works excellent fits in my pouch on my detector cover. and they last all day with no issues they may not look pretty but works well with no issues. All up cost me about $40 for 2 batterys and charger and parts to make connections.
Oooh well done.
I also have a 4500, I'd like to create a backup battery and would appreciate it if you could tell me what they are.
 
Just to clarify i mainly use headphones but also have a marshall external speaker that works with no issues.
 
Oooh well done.
I also have a 4500, I'd like to create a backup battery and would appreciate it if you could tell me what they are.
i will list what i used for the gpx4500

Battery's i purchased from ebay (8700mAh NP-F960) was the type i purchased
2x 5 Pin male 1x 5 Pin chassis gold plated pin suit for Minelab GPX power lead Purchased from Ebay (SolargoldAustralia was the seller)
4 Core screened microphone cable purchased from jaycar (Cat No. WB1540)
6.5mm Mono plastic line socket purchased from jaycar (Cat No. PS0166)
12V 5.5x2.1mm DC Power Socket Jack Male + Female Connector Purchased from ebay in a 5 pack


Sd2100
Battery's i purchased from ebay (8700mAh NP-F960) was the type i purchased

4 Core screened microphone cable purchased from jaycar (Cat No. WB1540)
6.5mm Mono plastic line socket purchased from jaycar (Cat No. PS0166)
2x 4 Pin Microphone Line Female Connector(Cat No: PS2012) To create small battery cable
1x 4 Pin Microphone Panel Male Connector(Cat No: PP2010)
12V 5.5x2.1mm DC Power Socket Jack Male + Female Connector purchased from ebay in a 5 pack

Pretty Much with the parts

use the male 5 pin connectors and microphone cable (female 4 pin for SD2100) you create a new battery cable to suit length needed mine is about 25cm
just solder each end to same number on plug.

Next you can use a small encloser,Jaycar Jiffy Box or just heat shrink and tape to create the power attachment so here you would solder 4 wires onto your 5 pin chassis (2 x power 2x audio 1 pin is not used) there a re multiple ways to do this if you wanted to you could attach to one end of battery cable to have it all in one but i like them separate.

Next once you have your power wires you can solder Dc power socket to power wires and then solder audio socket to audio wires and then onto battery
carefully open battery case (i run a stanley knife along the edges until pushes through the case at he top) carefully and slowly slide battery pack out of the the top it can be very delicate.

once out use a multimeter to work out + - on the bottom of battery then drill a hole in the case slide your DC cable through and solder to battery then cover over and slide back into case gently and lightly glue battery top back on and test DC connector works and battery charges in charger if not the wires at the top of battery may have come unsoldered.

hopefully this helps i am not good at instructions back can try break it down further if you get stuck i will also attach GPX wiring diagram from plug pins.gp4500 wiring.JPG
 
Just a update created a cleaner and simpler design yesterday using a Jiffy Box from jaycar and direct wiring instead of creating another cable for it.
 
Here are some pics and also the speaker i use with no issues
 

Attachments

  • IMG20220424184644.jpg
    IMG20220424184644.jpg
    4.9 MB
  • IMG20220424184652.jpg
    IMG20220424184652.jpg
    7.4 MB
  • IMG20220424184655.jpg
    IMG20220424184655.jpg
    6.7 MB
  • IMG20220424184702.jpg
    IMG20220424184702.jpg
    8 MB
  • IMG20220424184707.jpg
    IMG20220424184707.jpg
    6 MB
  • IMG20220424172908.jpg
    IMG20220424172908.jpg
    7.1 MB
i will list what i used for the gpx4500

Battery's i purchased from ebay (8700mAh NP-F960) was the type i purchased
2x 5 Pin male 1x 5 Pin chassis gold plated pin suit for Minelab GPX power lead Purchased from Ebay (SolargoldAustralia was the seller)
4 Core screened microphone cable purchased from jaycar (Cat No. WB1540)
6.5mm Mono plastic line socket purchased from jaycar (Cat No. PS0166)
12V 5.5x2.1mm DC Power Socket Jack Male + Female Connector Purchased from ebay in a 5 pack


Sd2100
Battery's i purchased from ebay (8700mAh NP-F960) was the type i purchased

4 Core screened microphone cable purchased from jaycar (Cat No. WB1540)
6.5mm Mono plastic line socket purchased from jaycar (Cat No. PS0166)
2x 4 Pin Microphone Line Female Connector(Cat No: PS2012) To create small battery cable
1x 4 Pin Microphone Panel Male Connector(Cat No: PP2010)
12V 5.5x2.1mm DC Power Socket Jack Male + Female Connector purchased from ebay in a 5 pack

Pretty Much with the parts

use the male 5 pin connectors and microphone cable (female 4 pin for SD2100) you create a new battery cable to suit length needed mine is about 25cm
just solder each end to same number on plug.

Next you can use a small encloser,Jaycar Jiffy Box or just heat shrink and tape to create the power attachment so here you would solder 4 wires onto your 5 pin chassis (2 x power 2x audio 1 pin is not used) there a re multiple ways to do this if you wanted to you could attach to one end of battery cable to have it all in one but i like them separate.

Next once you have your power wires you can solder Dc power socket to power wires and then solder audio socket to audio wires and then onto battery
carefully open battery case (i run a stanley knife along the edges until pushes through the case at he top) carefully and slowly slide battery pack out of the the top it can be very delicate.

once out use a multimeter to work out + - on the bottom of battery then drill a hole in the case slide your DC cable through and solder to battery then cover over and slide back into case gently and lightly glue battery top back on and test DC connector works and battery charges in charger if not the wires at the top of battery may have come unsoldered.

hopefully this helps i am not good at instructions back can try break it down further if you get stuck i will also attach GPX wiring diagram from plug pins.
How do you regulate the voltage of the batteries? Some of those batteries are over 7.4 fully charged the sds done like it over 7.4v
 
How do you regulate the voltage of the batteries? Some of those batteries are over 7.4 fully charged the sds done like it over 7.4v
you could use a step down convertor they are also fairly cheap and will fit
into the box.
 
Here are some pics and also the speaker i use with no issues
Brilliant! Thanks for sharing your build and great instructions. I have a coiltek battery regulated battery using the same batteries in my Sd2200. But the system has a rubbish way to connect to the battery. I use a piece of cut up push bike tube like a big elastic band to hold the battery to the connectors firmly but perhaps using plugs would be a better way for me to go.
 
Brilliant! Thanks for sharing your build and great instructions. I have a coiltek battery regulated battery using the same batteries in my Sd2200. But the system has a rubbish way to connect to the battery. I use a piece of cut up push bike tube like a big elastic band to hold the battery to the connectors firmly but perhaps using plugs would be a better way for me to go.
Yes I originally had that setup for my sd2000 which is what made me try work out a better setup.
 
i will list what i used for the gpx4500

Battery's i purchased from ebay (8700mAh NP-F960) was the type i purchased
2x 5 Pin male 1x 5 Pin chassis gold plated pin suit for Minelab GPX power lead Purchased from Ebay (SolargoldAustralia was the seller)
4 Core screened microphone cable purchased from jaycar (Cat No. WB1540)
6.5mm Mono plastic line socket purchased from jaycar (Cat No. PS0166)
12V 5.5x2.1mm DC Power Socket Jack Male + Female Connector Purchased from ebay in a 5 pack


Sd2100
Battery's i purchased from ebay (8700mAh NP-F960) was the type i purchased

4 Core screened microphone cable purchased from jaycar (Cat No. WB1540)
6.5mm Mono plastic line socket purchased from jaycar (Cat No. PS0166)
2x 4 Pin Microphone Line Female Connector(Cat No: PS2012) To create small battery cable
1x 4 Pin Microphone Panel Male Connector(Cat No: PP2010)
12V 5.5x2.1mm DC Power Socket Jack Male + Female Connector purchased from ebay in a 5 pack

Pretty Much with the parts

use the male 5 pin connectors and microphone cable (female 4 pin for SD2100) you create a new battery cable to suit length needed mine is about 25cm
just solder each end to same number on plug.

Next you can use a small encloser,Jaycar Jiffy Box or just heat shrink and tape to create the power attachment so here you would solder 4 wires onto your 5 pin chassis (2 x power 2x audio 1 pin is not used) there a re multiple ways to do this if you wanted to you could attach to one end of battery cable to have it all in one but i like them separate.

Next once you have your power wires you can solder Dc power socket to power wires and then solder audio socket to audio wires and then onto battery
carefully open battery case (i run a stanley knife along the edges until pushes through the case at he top) carefully and slowly slide battery pack out of the the top it can be very delicate.

once out use a multimeter to work out + - on the bottom of battery then drill a hole in the case slide your DC cable through and solder to battery then cover over and slide back into case gently and lightly glue battery top back on and test DC connector works and battery charges in charger if not the wires at the top of battery may have come unsoldered.

hopefully this helps i am not good at instructions back can try break it down further if you get stuck i will also attach GPX wiring diagram from plug pins.
Thank you for sharing your instructions stevenj48, i bet there has been quite a few of us get our detectors out after covid to find the battery pack has failed. Luckily i am not in that boat yet but can see it happening and to have a spare battery is priceless. once again thank you very much.
 

Latest posts

Top