Show us your Isolation Projects

Prospecting Australia

Help Support Prospecting Australia:

This site may earn a commission from merchant affiliate links, including eBay, Amazon, and others.
Joined
Sep 6, 2013
Messages
873
Reaction score
1,648
Location
North East , VIC
As the thread title suggests, Show us what you are doing to keep the cabin fever at bay while not being able to get out prospecting. It doesnt need to be prospecting related.

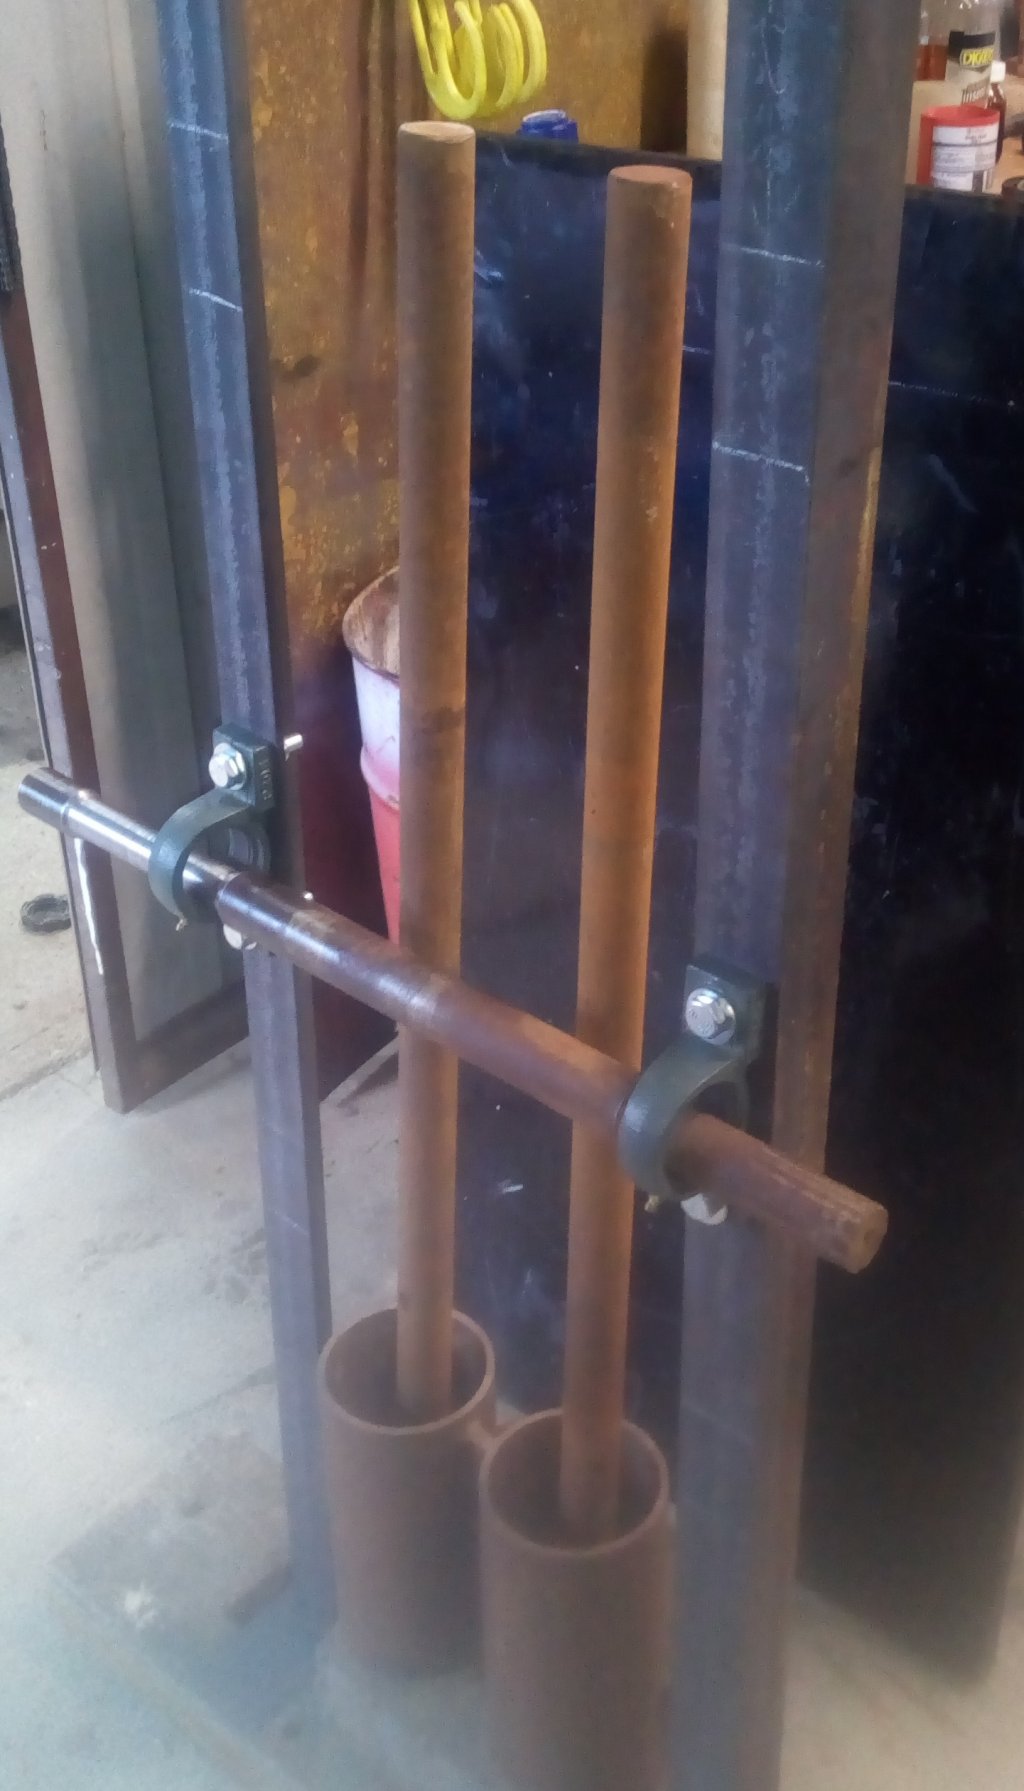
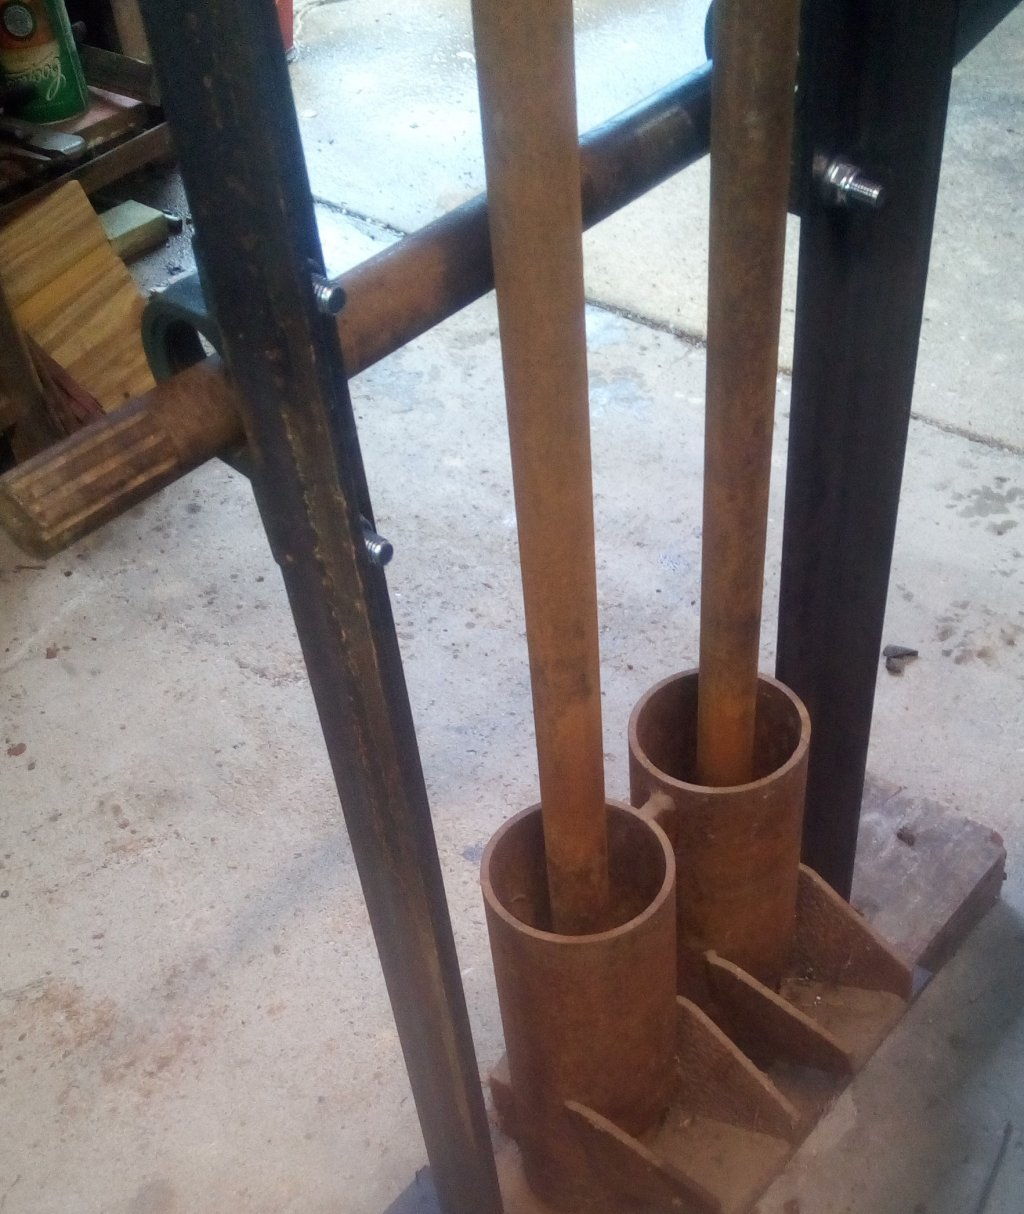
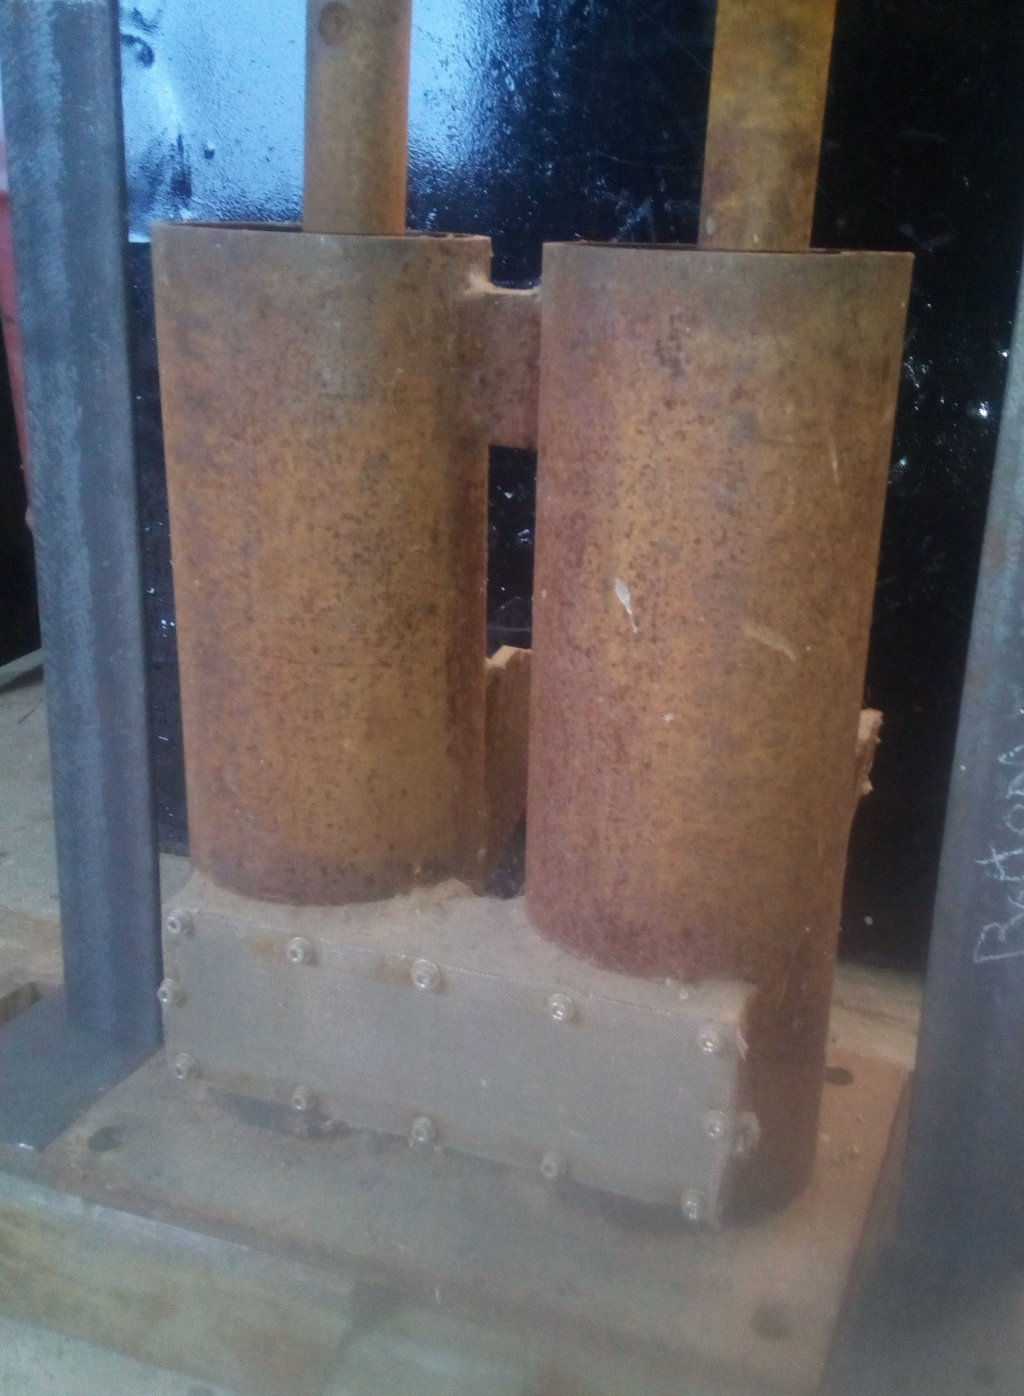
Heres My Very old stamper project that I started to build about 20yrs ago. I should be able to get it nearly finished without a trip to town for materials.
1586054551_stamper1.jpg

1586054552_stamper2.jpg

1586054595_stamperbox.jpg
 
Dihusky said:
Love to see the neighbours faces when this starts up, with the rhythmic thumping you'll really have them scratching their heads :lol:

set up some flashing blue lights inside the shed then come crawling out and ask the neighbour if he saw an alien spaceship take off 5 minutes ago.

And does he have a sore ass too ?
 
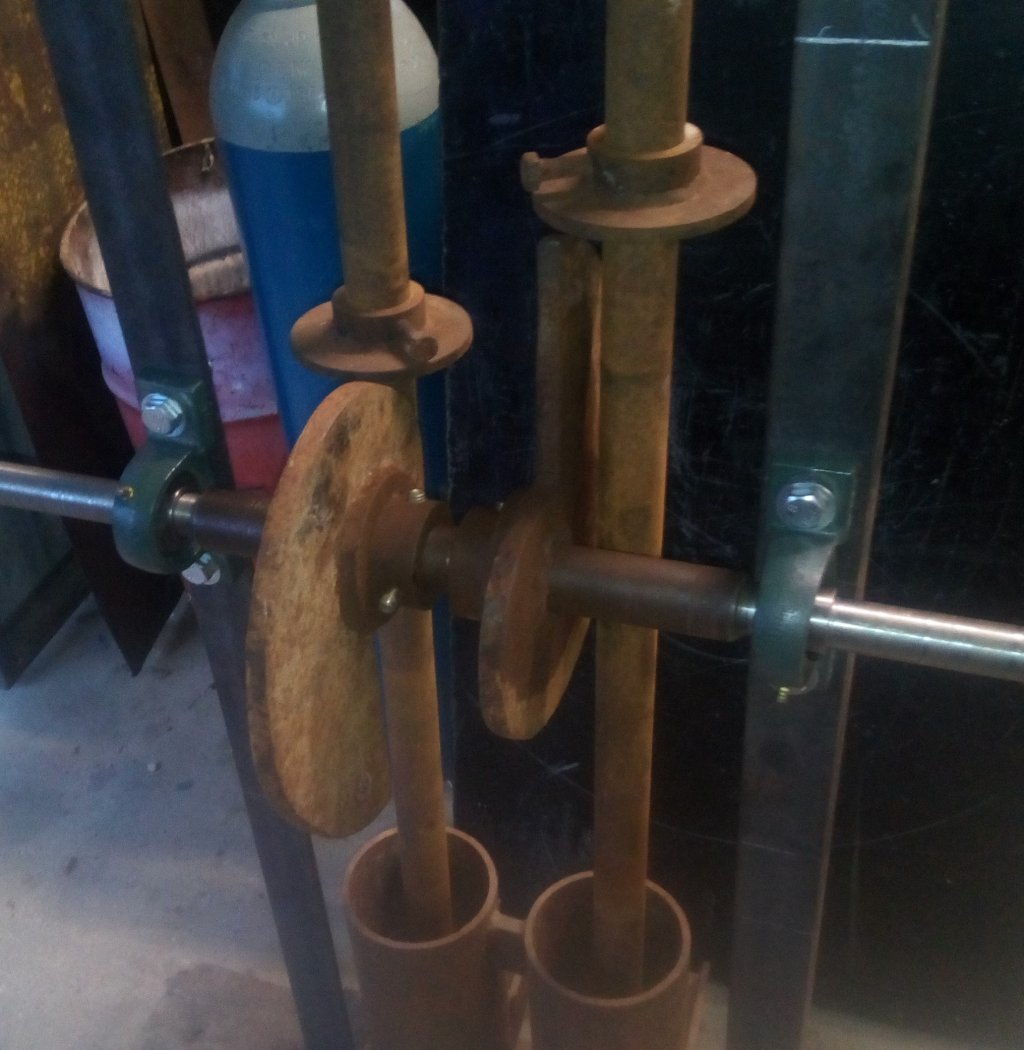
Quick update on yesterdays progress. Got the camshaft turned down to accept the 1inch ID bearings and swung the cams to see what if anything needs changing. I might need to flatten the raduis on the cams a bit and undercut the trailing edge. Ill start working on the timber stamp guides first though.
1586121643_img_20200405_174259_2.jpg


Has anybody else got a project in isolation they want to share. Tapestry, Brewing, Building. old cars. anything.
Edit to add my next project will be to learn how to make these pics fit the web page properly :/
 
Decided to "Clean Up" the 4x4 Aux Bat electrics. Partly inspired by my inadvertently dropping a steel rule onto the 6 fuse block terminal, which arced briefly. :) I decided to come up with something that would fit between the battery and the Engel behind the 2nd row seats, contain all the items safely, mount the connectors and able to be made in the shed. I don't have a full workshop, which limits me to saws, drills, files etc. I figured timber rather than sheet metal as it doesn't conduct electricity, lol and easier to work with. I also had a look at my small stock of material, to avoid going out.....

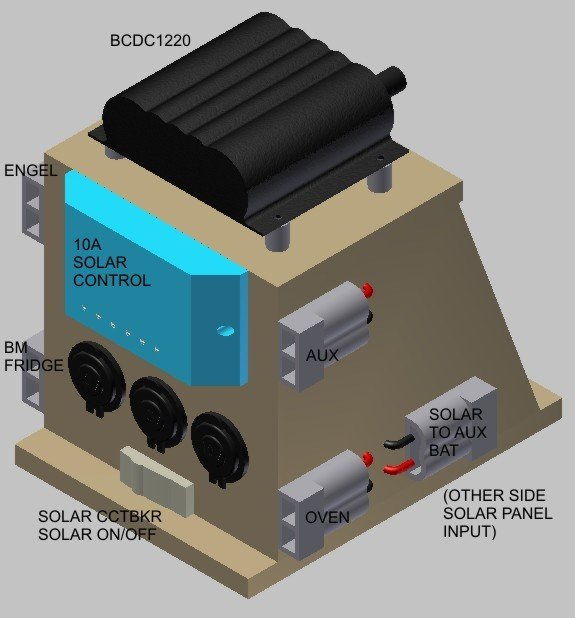
First thing, measure everything up, (I did disconnect the + lead on the battery to avoid another accident lol). Then onto the Computer, to put the grey matter to work. Here's the result
1586156212_power_box_front.jpg

The angle on the rear approximates the slope of the rear seat back. The 4 Anderson plugs (2 either side) at the front (actually facing the rear of the car) are outlets as noted.
Their Neg wires goes to the Neg terminal post (TP-) inside and their Pos wires to the internal fuse block (F1-4). The Redarc is on top and has standoffs to allow air circulation. The solar controller is where it can be easily seen and it's circuit breaker (also solar on/off) is at the bottom of that same face. In between ar 3 cig skt outlets. They will be solder parallel connected and Pos to Fuse F5 and Neg to TP-. There are 2 rear facing Anderson plugs, 1 each side. The one on the left side (not shown) is where the Solar Panel plugs in, the one on the right, will be Solar Cont to Aux Bat +. Inline Fuse at the Battery.
 
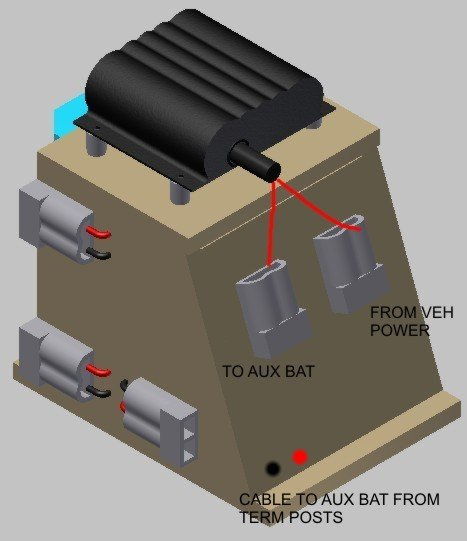
Here's the rear of the box. There are 2 Anderson plugs on the rear, one will be connected to vehicle power from the Start battery via the IGN Solenoid. It's fused under the hood, so no fuse needed at the rear. The other is the Redarc outlet to the Aux Battery (inline fuse at the battery)
1586156934_power_box_rear.jpg


The Red and Black dots represent a Pos/Neg Twin core from Aux Bat to TP+ and TP- with a 30A inline fuse near the battery to feed the box outlets. I'll work it so the back of the box, which will be removable, can be removed without disturbing the cable. I may look at another Anderson so it's "plug n play".
 
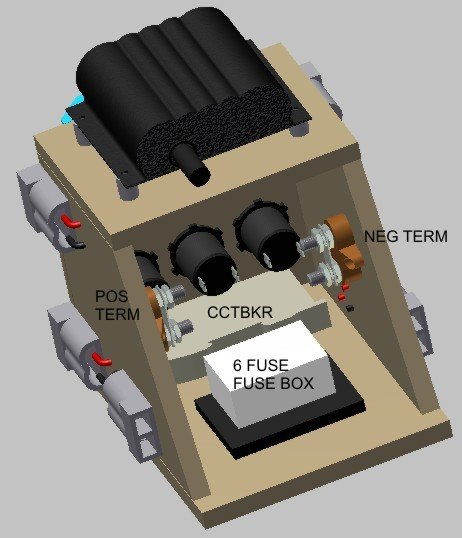
Inside of the box -
1586157256_power_box_inside.jpg


This is is at concept stage. By that I mean, details are missing, such as fixing the CCTBKR, here I will screw a block behind it or a Z bracket etc as it's in a cutout of the front panel butted up to the inside of that panel, so not going very far, lol. The reason it's at the bottom is that I only need to cut a chunk out of the edge, rather than an oblong hole if not on an edge.

There are many ways to do this job, but my limits are, available equipment and materials.

The removable back panel, might be as simple as a couple of bits of 12x12x1.6 alum angle on each side for it to rest against and a swivel plate on each outer corner to hold it on.

I thought about carpet covering, but given the real estate used with bolt on items, a coat of dark grey paint will do the job. The base extension front and back will have holes for it to screw to the drawer in the back of the 4x4.

Mat'l for the Base, top and each side is 12mm MDF which I have. The front and back will be 6-7 mm Plywood also in stock. :) I went thinner at the front for the panel mounting of the cig sockets. So, I figured if I did the same at the rear, I'd gain 10 mm inside space for the same outside dimensions.

So that's killed about 3 days on and off of isolation time. Time to get the hands dirty, lol. I always wanted to be a Designer/Drafter, but I knew that doing a Fitting/Machining/Toolmaker trade first, would come in handy one day, lol.
 
As noted in other threads, I have a BMPRO monitor bolted onto the Neg terminal. By making up this box, there are only 3 leads going to Battery +/-.

From the BCDC1220 for vehicle charging with the solar CCTBKR off when driving.
From the Solar Panel 10 A controller. Switched on by the CCTBKR when camped. *** Check Below.
Between the Battery and the above box to power everything else.

And, in hindsight, I will fit an Anderson to the Box connection, so everything will be able to unplug.

*** FYI I'm not using the Solar Controller Load Terminals. The reason I am switching the solar panel input + before it goes to the Controller is;

The process for connecting pretty well all controllers is to connect the +/- cables between the controller and the battery first. This is so the controller can be configured before the panel is connected. In the instance of my controller it is a duel 12/24 volt controller. Once connected it auto senses the battery voltage and stores that info at 12 V. I then go into the menu to tell the controller the battery is an AGM, as the Controller can charge other battery chemistry. Once this is done, the solar panel can be connected.

If I switch the output of the controller, I have to disconnect the panel to reconfigure every time. By switching the input, it's no different to zero input at night. :)
 
Nice work and well planned out It looks a lot better than some of the dogs breakfasts Ive seen in under bonnet installations. As long as anything that produces heat has plenty of airflow it shouldnt overheat.
 
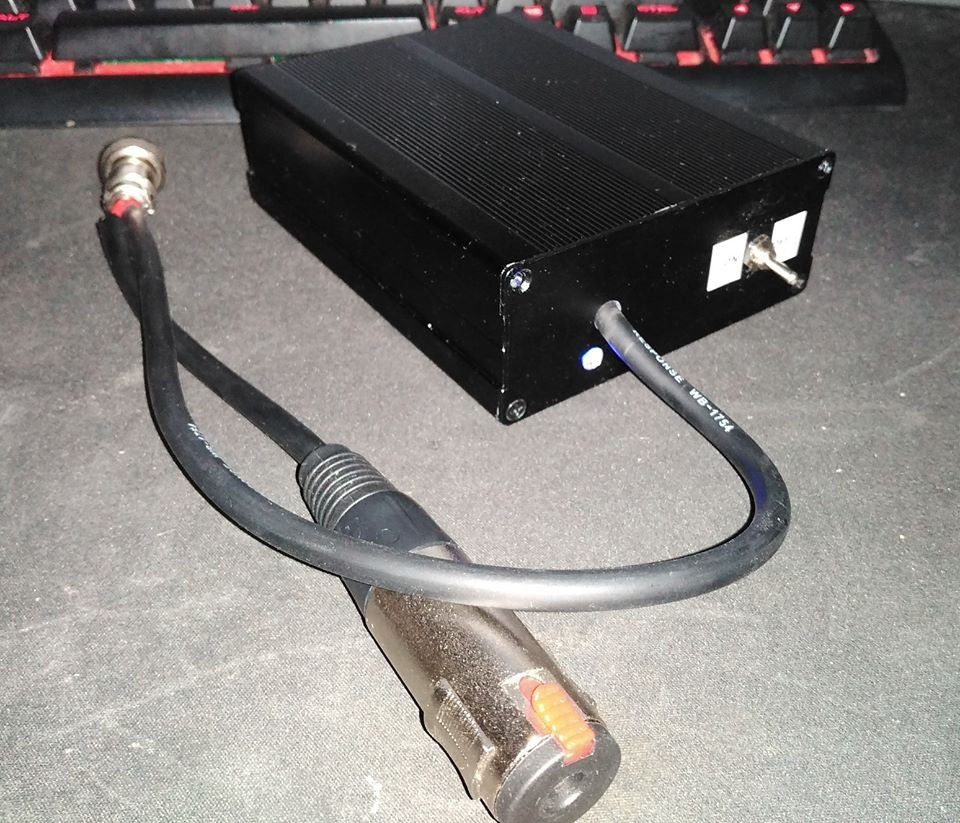
Light weight battery for SD GP machines, 3 sets of 18650 in 2 pair series of 7.8v regulated down to 6.7v 3x 2 cell charging boards, charged by an 8.4v 5 amp power brick.
Works pretty well, much lighter than the gel cells, only thing i didn't include was a voltage status indicator.

1586175616_90145689_240072320375566_662704382801870848_o.jpg
 
With Ref to my above project - (I could put this in my other Topic on Bush Power, but it's relevant to the power box here)

The pic below show a simple block diagram detailing 2 ways to connect up a DC circuit of battery, charging and loads. (Keep in mind that the DC-DC charger and Solar panel are switchable, so one or the other.)
1586310769_diagram.jpg

As to what and why -
Diag. 1 (ignoring earth/-) shows all positive wires going to a terminal block, then to the battery.
Diag. 2 shows each positive wire going individually to the battery.

They are both similar in that, everything is connected to the battery. Where they differ;

1. Diag 1 - The lead from the terminal post to the battery carries the sum total of any charging and or loads. So it needs to be of a gauge and fuse to carry that total.
2. Diag 2 - As each lead goes to the battery, it needs only to be of a gauge and fuse to carry that specific load.

These are minor differences that using the correct gauge wire will accommodate. However, the important difference is - In Diag. 1 the charging and loads can interact with each other without the battery (electric current takes the easiest path to form a circuit). Which means that if there were a spike in output from solar or DC-DC it gets applied directly to the load. In Diag. 2 each charging source is connected to the battery, here a spike is cushioned by the large resistance of the battery before being applied to the load.

This is an over simplification in explanation, but relevant to which is the preferred way to connect. Definitely Diag 2. lol.

In the case of the loads, in my instance, I have 1 and at times 2 fridges (7.5 A), a 12 V oven (6 A), 3 x Cig sockets (Total up to 15 A) and an Auxiliary Anderson output (water pump @ 4 A). Here I will be "ganging" the wiring to a degree. Each Load Pos (+) wire of the correct gauge will go to a Fuse Block with the correct Fuse for the device. The Feed from the battery will be one wire to the fuse block. That wire will need to be able to carry the total current of the attached devices (33-34 A). As the distance from fuse block to battery is < 40 cm, 6 mm sq should do. I would almost never use all outputs at once, but, needs to be designed for that. Hope this helps... :)
 
Running out of stuff to do.
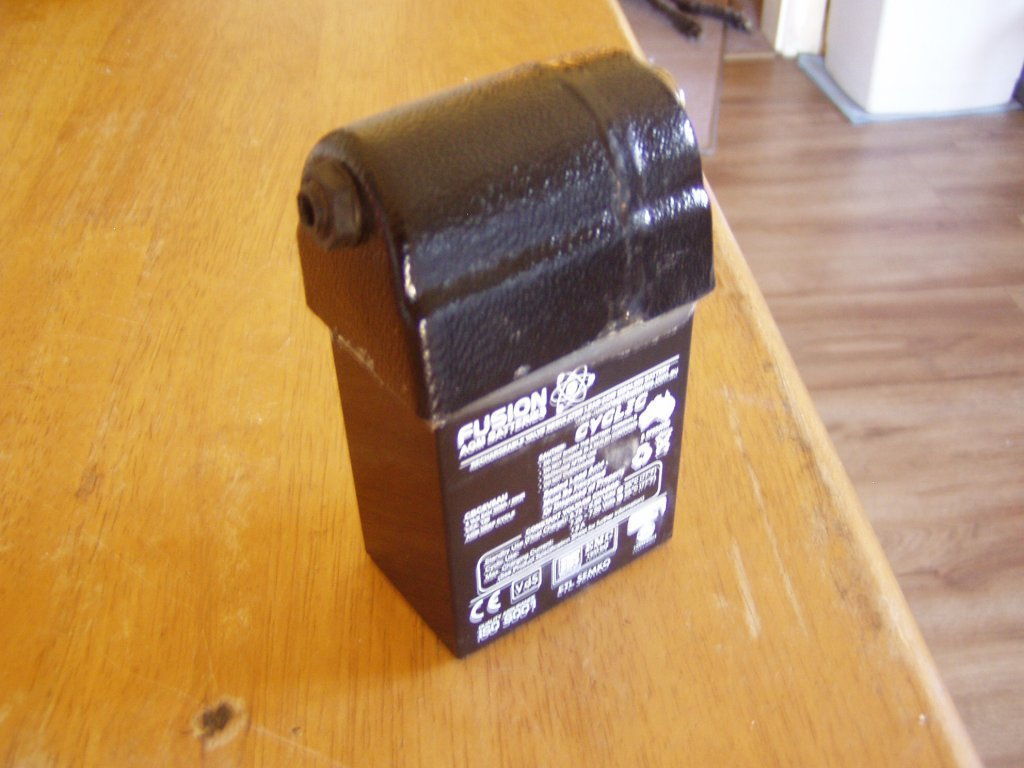
I cut back my dome top to fit a 6AH battery. Half the weight of the 12AH Still lasts 7 hours in the field and only costs $23 to replace.

You can fuse the plastic together using the left over from the dome top by soaking it in acetone overnight / sticks like s..t to a blanket. :pickshovel: :perfect:

1586319932_oo.jpg
 

Latest posts

Top